2026 Best Thread Fix Kit for Global Buyers?

Choosing the 2026 best Thread Fix Kit is not about buying the largest box. It is about matching the repair system to the damaged thread, base material, and working conditions. A kit for an aluminum housing may not suit a steel bracket. Check the thread sizes, insert type, drill, tap, and installation tool before comparing prices. Small details matter. A mismatched tap can turn a minor repair into a replacement job.

Fastening researcher John H. Bickford’s published work offers a useful principle. In paraphrase: “Reliable fastening starts with sound threads.” That is not a verbatim quotation, but it captures why repair quality depends on correct preparation and installation. For global buyers, also inspect product documentation, replacement insert availability, packaging, and clear measurement standards. Confirm the listed sizes match the drawings and tools used by your team. A low-cost kit is less useful when essential components are missing or difficult to replace.

This guide compares Thread Fix Kit options by practical criteria: size coverage, material compatibility, tool quality, instructions, and long-term serviceability. Look for crisp tap markings, a steady installation mandrel, and inserts that sit evenly below the surface. These details are easy to overlook online. Even this comparison has limits: no single kit fits every repair, and seller descriptions may omit important specifications. Treat the shortlist as a starting point, then verify the fit for your actual application.
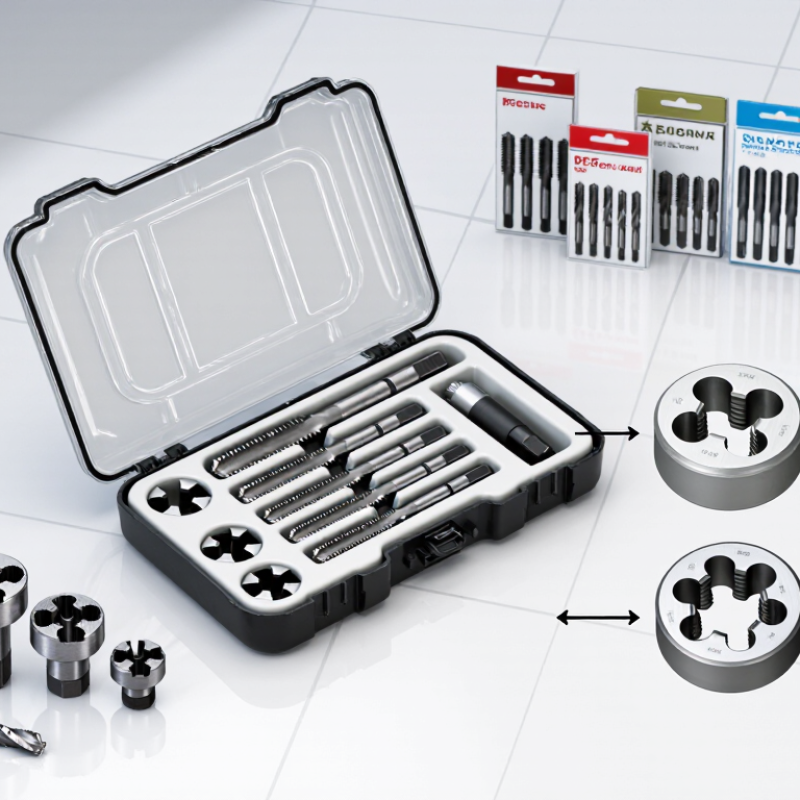
2026 Best Thread Fix Kit for Global Buyers?

Define Thread Repair Kits and the ISO 68-1 Standard’s 60° Metric Thread Profile

A thread repair kit restores damaged threads, commonly inside an aluminum housing or steel component. Depending on its design, it may include a drill, a special tap, installation tools, and wire inserts or solid bushings. The replacement thread gives a fastener a usable seat again. It does not make every damaged part safe to reuse; cracks, severe distortion, or thin surrounding material need careful assessment.

ISO 68-1 defines the basic profile for ISO metric screw threads, including the familiar 60° angle between the thread flanks. It describes the profile, not a complete repair procedure or every dimension needed to select a kit. For example, an M8 × 1.25 thread has an 8 mm nominal diameter and a 1.25 mm pitch. The repair method must match that size and pitch, along with the component’s material and available wall thickness. Small details matter.

In practice, keep the tap square to the original hole and clear chips as you work. A crooked start can leave an insert misaligned, even when the finished surface looks neat. Check the kit instructions for its specified drill size; it may differ from the original hole diameter. That distinction is easy to miss. A repaired thread can feel firm by hand yet still need inspection before the fastener is returned to service. ISO 68-1 helps explain the thread shape, but it cannot confirm that a particular repair is suitable.


Identify Damaged Threads Using ISO 261’s 1–300 mm Metric Diameter Range

2026 Best Thread Fix Kit for Global Buyers?

Identify Damaged Threads Using ISO 261’s 1–300 mm Metric Diameter Range

ISO 261 covers metric screw-thread diameter and pitch combinations across a nominal diameter range of 1–300 mm. That range is a useful starting point, not proof that every pitch exists for every diameter. Measure the bolt’s outside diameter with a caliper, then check pitch with a thread gauge. For example, an M8 bolt commonly uses a 1.25 mm coarse pitch. Small differences matter. Dirt, flattened crests, or an angled measurement can lead to the wrong identification.

Tips: Clean the threads with a soft brush. Compare the gauge against an undamaged section, and check more than one thread. Don’t force a mismatched gauge.

Look for shiny flattened peaks, torn metal, or a nut that binds after only a few turns. These signs can indicate damage, but corrosion or cross-threading may look similar. A visual check alone can mislead; verify diameter and pitch before choosing a repair method. Match the kit’s stated thread size to your measurements, and confirm whether it repairs internal or external threads. If the pitch remains uncertain, pause and remeasure rather than cutting more metal.

Compare Insert and Solid-Bushing Kits Against ISO 965 Thread Tolerance Classes

Insert and solid-bushing kits solve different thread-repair problems. Inserts create a new internal thread while retaining the original hole’s nominal size. Solid bushings add a sleeve, often with an external thread that anchors the repair and an internal thread for the fastener. Neither design automatically guarantees an ISO 965 tolerance class. The finished thread must match the drawing’s specified metric size, pitch, and tolerance, such as 6H for an internal thread.

For buyers, compare the kit’s stated thread class with the application requirement, not just its size label. ISO 965 defines tolerance classes for metric screw threads; it does not certify a repair kit as a whole. Check the installation drill size, tap, engagement length, and recommended gauges. A tight fit can make assembly difficult; a loose one may reduce reliable engagement. Material and temperature matter, too. A detail that is easy to overlook.

Tips: Confirm the thread with a calibrated gauge after installation. Check that the fastener enters smoothly by hand, without forcing it. Review the drawing and kit instructions together. If the repaired part carries significant loads, have a qualified engineer verify the design. Real workshop conditions are rarely perfect, so allow for alignment and tool wear.

Install a Wire Insert: Drill, Tap, Fit, and Remove the Tang

A wire insert can restore useful threads, but the hole preparation determines the result. Check the kit chart for the specified drill size; a close-looking substitute may leave the insert loose or make tapping difficult. Clamp the part securely, keep the drill square to the surface, and clear chips before they pack into the hole. A light chamfer helps the insert start cleanly. Small details matter. Tap by hand with steady pressure, backing off now and then to break chips. Use suitable cutting fluid for the workpiece, and stop if the tap binds.

Clean the finished threads, then wind the insert onto the installation tool without stretching its coils. Set it slightly below the surface, often about a quarter to half a thread pitch, unless the kit instructions specify otherwise. Check the depth with a fastener. Do not force it. Break off the tang with the kit’s punch, supporting the tool squarely so the insert does not twist. Remove the tang from the hole and inspect the first threads. A small burr or a hurried tap can spoil an otherwise tidy repair; that part is easy to underestimate.

2026 Best Thread Fix Kit for Global Buyers? - Install a Wire Insert: Drill, Tap, Fit, and Remove the Tang

Selection or Installation Stage Practical Reference What to Check Buyer or Installer Tip
Thread system Metric coarse examples: M6 × 1.0, M8 × 1.25, and M10 × 1.5. Unified coarse examples: 1/4-20, 3/8-16, and 1/2-13. Confirm the nominal diameter, pitch or threads per inch, and thread standard before ordering. Metric and Unified threads are not interchangeable, even when their diameters appear similar.
Kit contents A typical kit for one thread size includes a specified drill, an STI (Screw Thread Insert) tap, an installation tool, wire inserts, and a tang-break tool. Check that the kit includes the tools and insert sizes required for the intended repair. Replacement drill and tap sizes must follow the kit maker’s specification; they can differ from standard fastener drill-and-tap sizes.
Step 1: Drill Drill the damaged hole to the diameter specified for the selected wire-insert system. Keep the drill aligned with the original hole and control the depth, especially in blind holes. Remove chips and confirm there is adequate material around the hole before tapping.
Step 2: Tap Use the matching STI tap to form the larger receiving thread for the insert. Use a suitable cutting lubricant when appropriate for the workpiece material, and avoid forcing the tap. Keep the tap square to the hole; follow the tap’s instructions for chip clearing and blind-hole depth.
Step 3: Fit the insert Install the insert with the specified tool until its top coil is slightly below the work surface, as directed by the system instructions. Choose an insert length appropriate to the available thread depth and application. Common insert lengths are described by nominal multiples such as 1D, 1.5D, and 2D, where D is the nominal thread diameter; availability varies by thread and kit.
Step 4: Remove the tang After installation, break off the driving tang with the specified tool when the insert design has a removable tang. Check that the tang is removed cleanly and does not remain where it could obstruct the fastener. Follow the insert instructions for tang disposal and for blind-hole applications; tangless insert designs use a different installation process.
Material suitability Wire inserts are commonly used to restore or reinforce internal threads in materials such as aluminum alloys and other metals. Verify compatibility with the workpiece, temperature, corrosion exposure, and service load. For critical or safety-related repairs, use an approved repair procedure and inspect the finished thread.
Global purchasing check Compare the stated thread standard, size range, insert material, included tools, and replacement-part availability. Check whether dimensions are listed in metric, inch, or both, and confirm that the kit matches the fasteners used in the equipment. Ask for the kit-specific drill and STI tap specifications rather than relying on a generic chart.

Note: This table is a general selection and process reference, not a substitute for the instructions supplied with a particular wire-insert system.

Verify Repaired Threads with ISO 1502 Gauges and Correct-Fit Checks

2026 Best Thread Fix Kit for Global Buyers?

After installing a thread insert, verify the repaired thread with clean, undamaged gauges—not just a matching bolt. ISO 1502:1996 sets gauging practices for metric screw threads. Its rule for a NOT GO plug gauge is especially useful: it should not enter an internal thread by more than two turns. Check the correct thread size and tolerance class; the wrong gauge can make a sound repair look faulty.

Keep the workpiece and gauge free of chips, then align the gauge squarely. The GO gauge should engage smoothly through the required thread length. The NOT GO gauge should stop within the specified limit. Don’t force either one. A slight catch is a warning, not a verdict; inspect for burrs, debris, or a tilted insert, then check again. Record the gauge identification and calibration status for traceability.

Finish with a correct-fit check using the intended fastener. Turn it in by hand for several threads before applying any tool. It should seat without binding or visible wobble. This check complements gauging; it does not replace it. Results can still be misleading if the fastener’s own threads are worn. That detail is easy to miss.

Article Source:

An exceptional record of quality and service for 35+ years.